
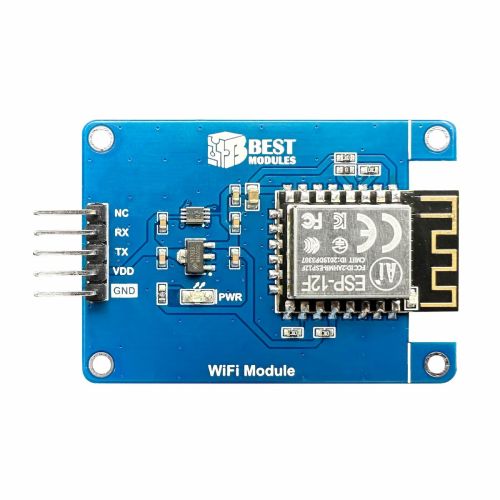

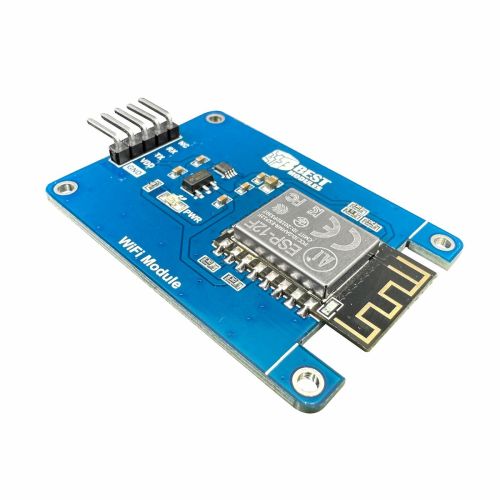

Description
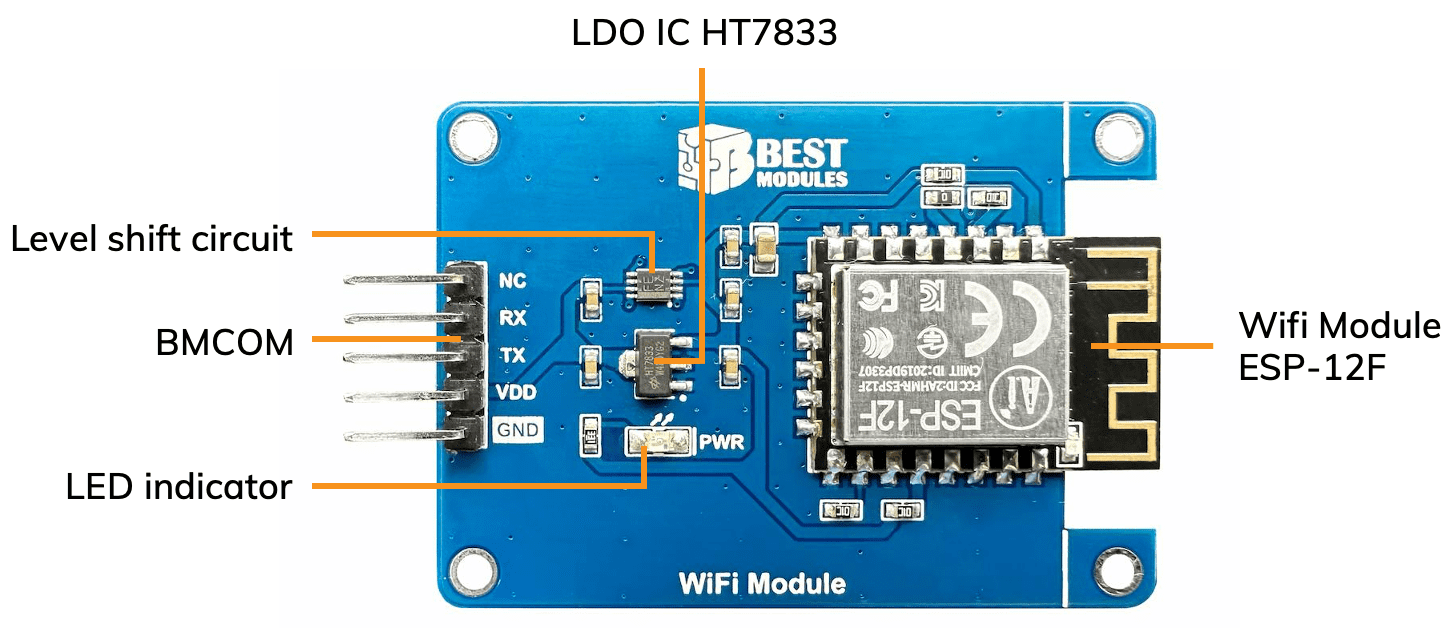
The ESP-12F is a WiFi module designed by the Shenzhen AI-Thinker Technology. Inside this module, there is a built-in 2.4GHz WiFi MCU named ESP8266, which was developed by Shanghai ESPRESSIF. You can find development boards in the market that use the ESP-12F, and these development boards make it simple for users to create their products using the Arduino IDE.
However, if users would like to use the ESP-12F in more complex projects, they might run into a problem of not having enough pins.
The BMC81M001 is designed as a module. It breaks out the ESP-12F’s pins to match BMCOM connectors. With the BMCOM, you can directly connect the product to BMduino development boards, such as BM53A367A. You can use the product with other development boards, such as Arduino UNO, as well.
The ESP8266 has a rich and comprehensive set of AT instructions, including WiFi, TCP/IP, MQTT, HTTP, Web server, and more, supporting various functional applications. The default transmission baud rate for the ESP8266 is 115200bps. You can issue the AT instruction (AT+UART) to configure the baud rate via the development board.
- Input voltage: 3V~5.5V
- Operating current:
– Transmitting data: 180mA @3.3V / 11Mbps
– Receiving data: 60mA @3.3V / 70dBm - Standby current: 4mA @3.3V
- WiFi module: ESP-12F
– Wireless protocol: 802.11b/g/n
– Frequency band: 2400MHz~2483.5MHz - UART interface (baud rate 115200bps, configurable)
- Dimension: 55 x 35.25 x 7.5 mm
- Net weight: 8g
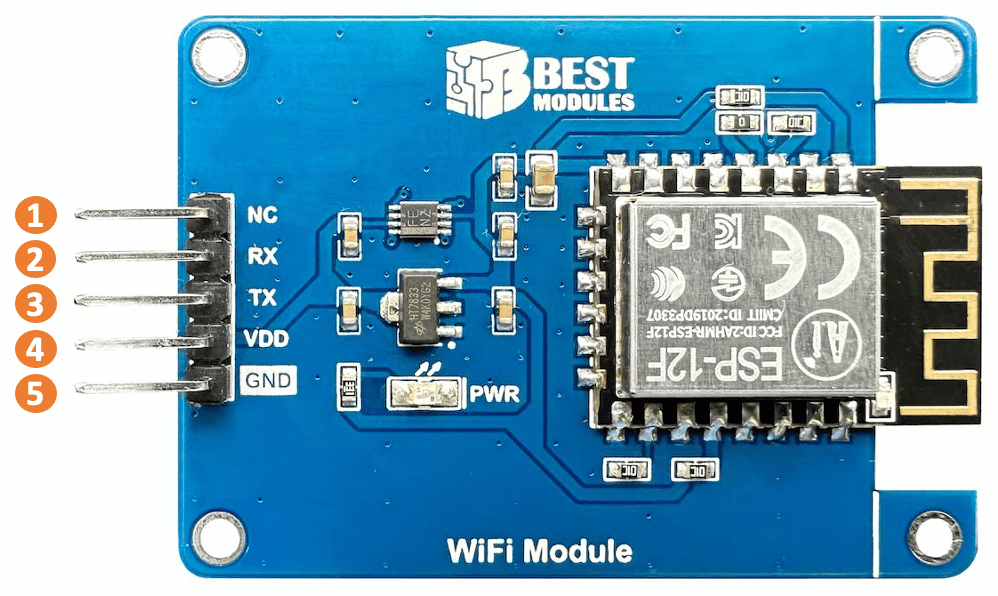
| Pin | Pin name | Function |
|---|---|---|
| 1 | NC | – |
| 2 | RX | UART: RX |
| 3 | TX | UART: TX |
| 4 | VDD | Power supply: 3V~5.5V |
| 5 | GND | Ground |
To upload the data measured by sensors (e.g., temperature, humidity) to the IoT platform ThingSpeak, you need to create connections to both the WiFi base station and ThingSpeak.
The connection steps are as follows:
-
- The SSID and password of the WiFi base station are required to create a connection to WiFi base station.
- It’s necessary to register a member on the ThingSpeak website (free) before connecting.
Create MQTT devices and channels after registering.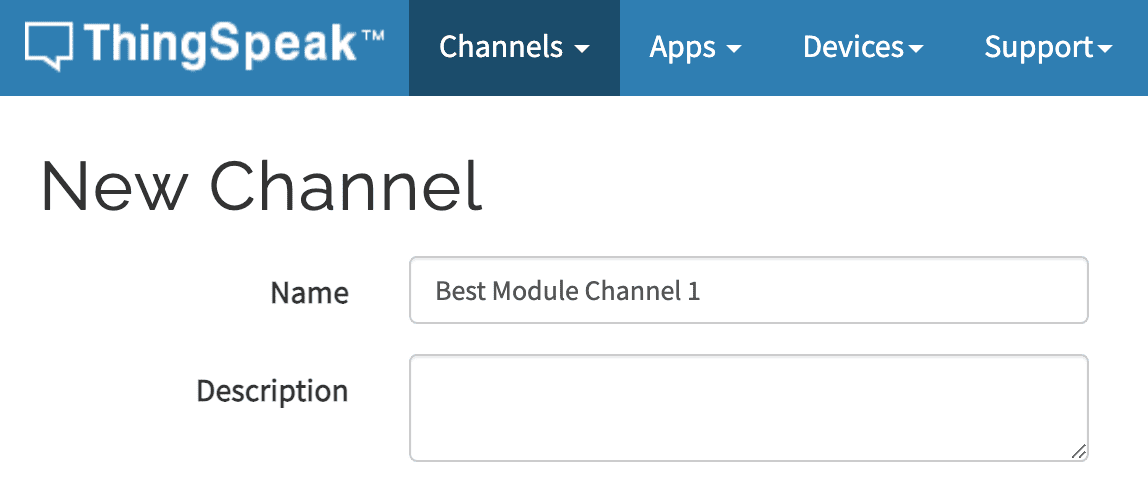
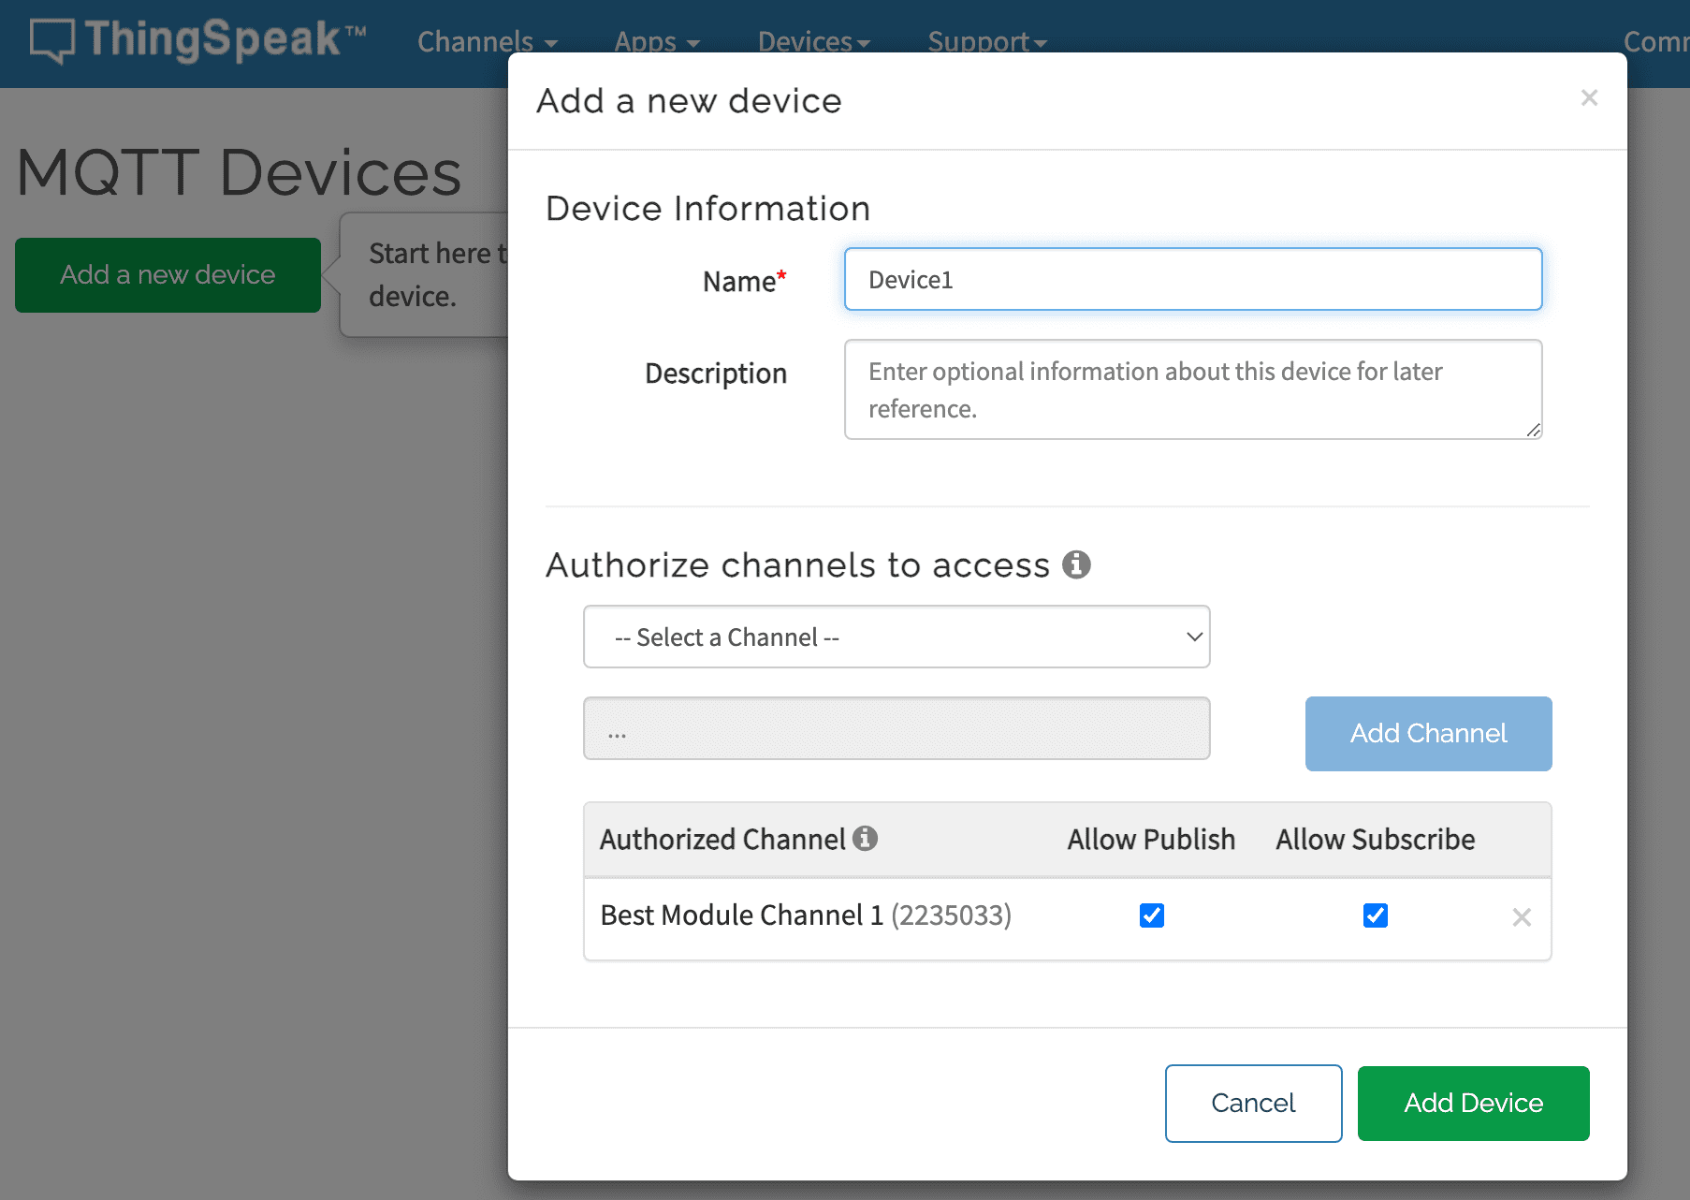
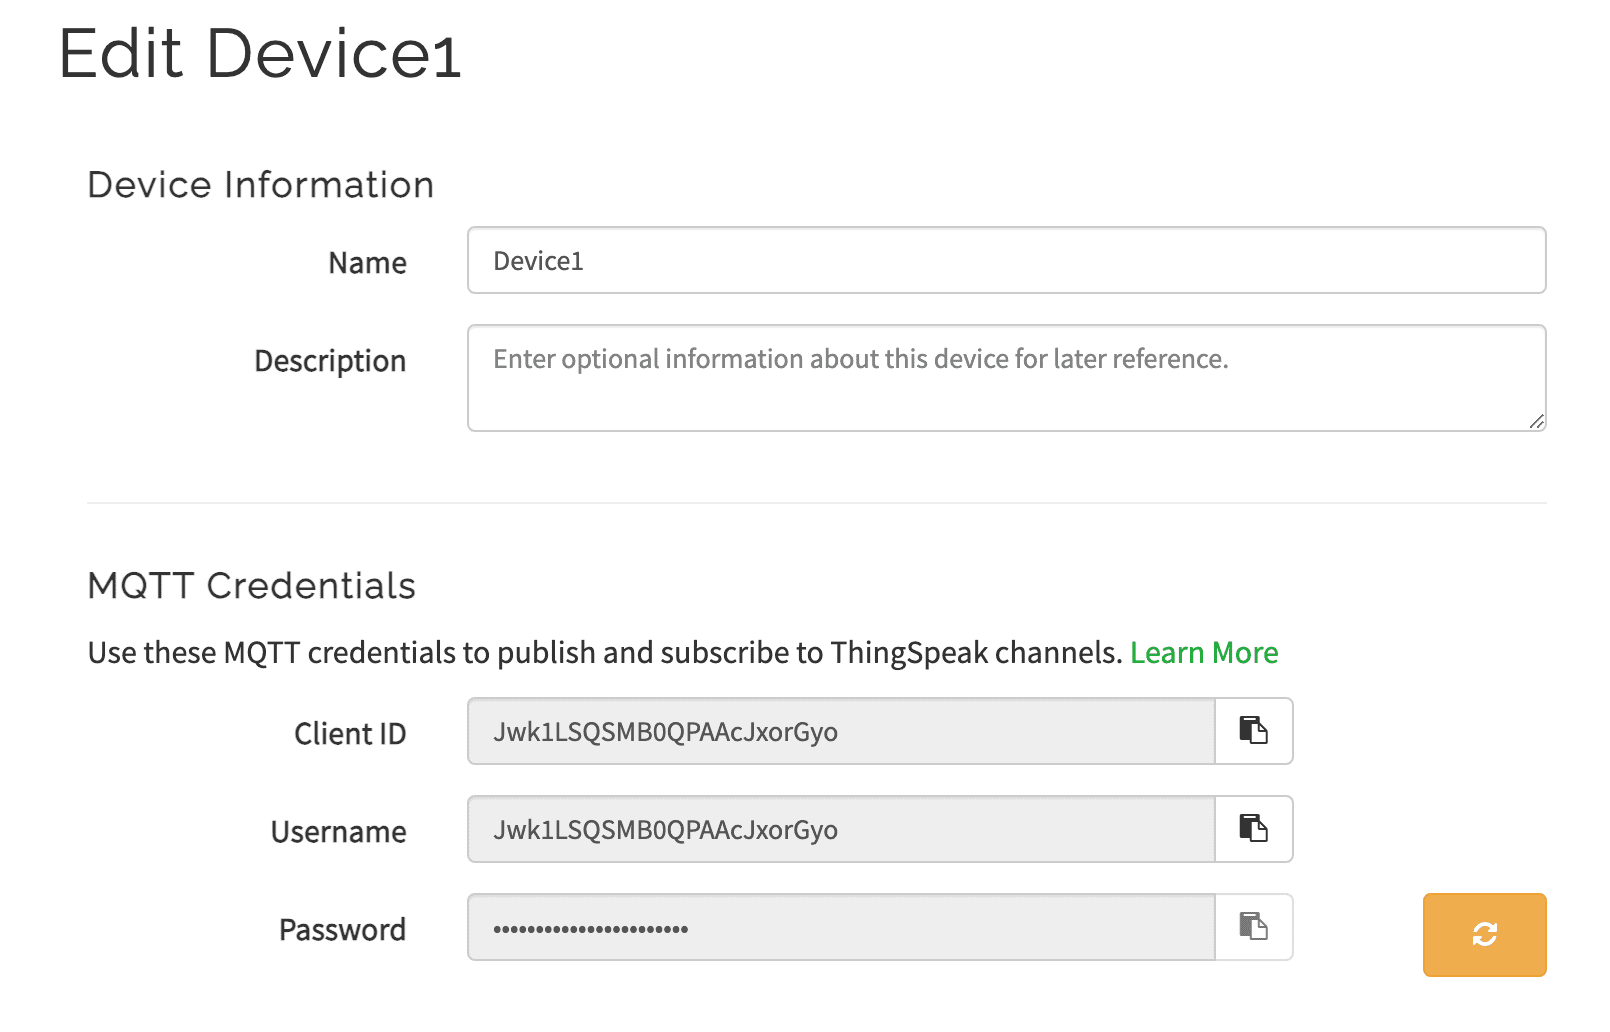
You will get the data of MQTT_USERNAME, MQTT_CLIENT_ID and MQTT_PASSWORD. Type the information in the Arduino library.
- Upload temperature and humidity data to ThingSpeak in a predefined string format.
The data of the first and second steps are written inside the setup() function of the Arduino library, and they only need to be executed once to create the connection. The data of the third step are written inside the loop() function, where the temperature and humidity values are uploaded periodically.
All of these steps can be easily accomplished using the Arduino Library of BMC81M001. As mentioned in the product description, the development board use Arduino Library functions to send AT instructions to the ESP-12F WiFi module, and the ESP-12F module create the connections and transmit or receive data.
There are the Arduino library functions and the corresponding ESP8266 AT instructions.
| Step | Function | Arduino library | AT instruction |
|---|---|---|---|
| 1 | Connection to WiFi base station |
connectToAP | AT+CWMODE AT+CWJAP |
| 2 | Connection to ThingSpeak | configMqtt | AT+MQTTUSERCFG AT+MQTTCLIENTID AT+MQTTUSERNAME AT+MQTTPASSWORD AT+MQTTCONN |
| 3 | Data uploading | writeString | AT+MQTTPUB |


Reviews
There are no reviews yet.